Our Process
Step 1: Assessment
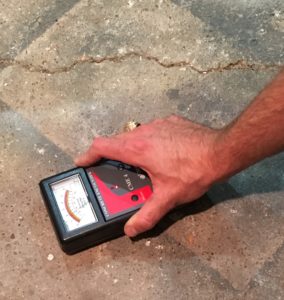
The installation process starts with measuring the square footage of the space along with determining the type of concrete you have, depending on its:
- Moisture Content
- Structural Condition
- Hardness
Each of these variables contributes to how we approach the next and most important step – concrete preparation.

Step 2: Floor Preparation
While other floor coatings companies may choose the convenience of acid washing their floors, we are committed to using diamond grinders exclusively to profile your concrete surface. In addition to avoiding chemical wash off, we have found diamond grinding to extend the life of your floor significantly by providing the greatest adhesion possible.
Diamond Grinding produces a course profile while removing any deteriorated or weak concrete, leaving the surface immediately ready for coating. In the same way that wood must be sanded before it can be stained, concrete must be profiled before it can be coated.
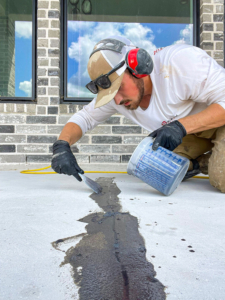
Step 3: Concrete Reconstruction
At this point in the installation process, we turn our attention to repairing and reconstructing your concrete floor. We have an extensive crack, pit, and spalling repair process wherein we use diamond blades to open up cracks and expose any visibly distressed areas in your concrete. The mender product we then apply cures to be harder than concrete in a matter of minutes transforming weak points to strong points and leaving us ready to install your beautiful new flooring.

Step 4: Coating the Floor
Typically in garage floor applications we will apply a polyurea full chip coating system. We start by using a small amount of our base coat, a 100% solids self-priming pure polyurea, to cut in all the edges around the floor. Once this is done, we mix and pour our primary coating onto the floor in a line and use a roller to spread the material in an even manner to achieve the desired thickness. We repeat the mixing and rolling process until the whole surface is covered completely.
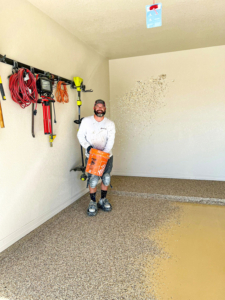
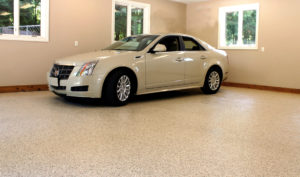
Step 5: Broadcast Vinyl Chip
When the floor is coated completely, we mix our flake to insure an even blend of colors. We then broadcast the flake into the wet coating by hand, covering the whole floor with the flakes. This method of over broadcasting ensures that the floor is completely covered, leaving it uniform in color and texture.
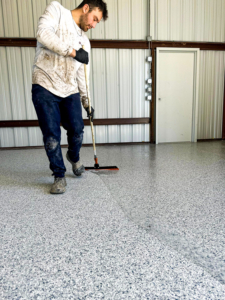
Once our basecoat is fully cured we “cut” and “scrape” any loose or vertically standing flakes. In most applications, we scrape the floor from front to back and also side-to-side to ensure we have hit all angles of the chip. This produces a nice even texture across your entire floor.
Step 6: Clear Coat Application
After your floor is prepped, coated, flaked, scraped, and vacuumed, we can start our final step – the application of our 93% solids polyaspartic Polyuria UV stable clear coat. We pour the mixed product directly onto the floor and use a soft squeegee to spread the coating to our desired thickness. We then use an 18-inch roller to back and cross roll the floor. This takes out any lines left behind by the squeegee and leaves a fine, glossy, clear coat finish over the entire floor.
Step 7: Your New Floor Coating
You’re in business! 12 hours after the top coat is applied you can confidently walk on your new coating, and 36 hours later you are ready to park and drive on the coating. We hope you fully enjoy your new floor!